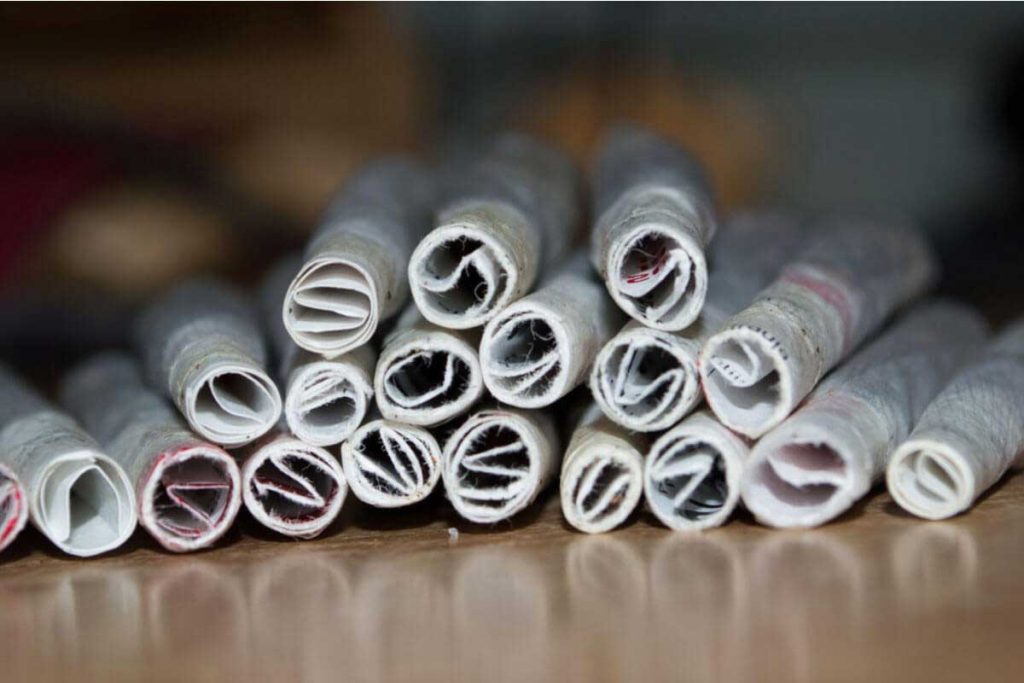

Your option is not going to be limited to just one kind of filter. The truth is that there are several types of filter tips. You can either buy or make one on your own. If it is your first time making a joint filter, then you should read on to learn how you can make it a worthwhile experience.
A joint filter will be an excellent addition to your kit if you’re a stoner. However, many cannabis smokers just skip making this thing when rolling the joint. Perhaps, they do because making a joint filter is quite time-consuming, which can be a hassle if they are in a hurry. It even adds extra effort to the rolling process. Nonetheless, the benefits that one can get from rolling a joint filter is going to pay for the exerted effort.
Aside from keeping the joint together, you will enjoy the entire experience when smoking cannabis by using a joint. With a joint filter, it is easier to prevent the whole joint from crumbling while you’re smoking. No more interruptions to occur for as long as you invested some time to make a joint filter.
Designed to be sturdy, a joint filter is often made with a tough paper or cardboard that adds more stability to the base of the joint. That’s how it helps prevent the joint itself from crumbling. Moreover, the joint tip will give improved value for the weed. You can consume the entire plant material and satisfy yourself better by using one. You don’t have any leftovers to clean after the session.
If you’re hesitating to try making a joint filter just because it needs your time and effort, you can make pre-rolls and have them ready to use. This way, you will have a joint filter to use the next time you want to sit down and smoke.
As said before, you can either buy or make joint filters on your own. If you choose to buy it, then you may look for it at the nearest shop in your area. If you’re patient and want to save some money, then why not choose to make at least one in the comfort of your home? This option will save you money as well.
There are some things that you can use in making joint filters. Many of these items are often available in your home. Cardboard is a good example, which is among the most commonly used materials in making joint filters. Anything that is made with cardboard will be enough for as long as you’re sure it’s going to fit your joint’s tip.
If the cardboard is unavailable, you can use the spirally small noodles called fusilli. It is widely common and available in grocery stores. Its main benefit is that you can use it on the spot. No preparation needed. Get a piece, break it, and get the one that is rich for the size of your joint. Look for thinner noodles because they are more effective.
Your last option is an index card. It is cheap and quick to roll. You don’t need much effort to get the job done.
There are many kinds of joint filters. Likewise, there are multiple ways to make joint filters. The possibilities and choices available are almost unlimited. All of these techniques will require your creativity, patience, and minimal effort.
Do you want something simple? If you say so, the standard type will be good for you. In this joint making technique, you just have to get your preferred material and fold it to an accordion on the tip. Hold the tip, flip it over, and roll the material with your fingers until it forms a cylinder. Look at the rolled material and check it if it has the letter “W” formation inside the circle.
This technique is also quite easy to do. To get started, take the filter and start making the accordion. With around 4 folds, try to form the shape of Mercedes, which appears as the inverted letter “Y”. Finish the job by rolling the rest of the paper over the upturned Y.
In making this one, get one tip of the paper filter and slightly roll it. After that, start unrolling and rolling the tip with your fingers. Apply pressure near the tip as you do that. This way, the tip will form the girelle-like design. Don’t forget to press down from time to time while rolling the paper to tighten the circle.
Unfold the rest of the paper once you got the perfect design and roll it again. Unfold it again, slightly roll the tip, turn it upturned, slightly roll it forward, take it up and pleat it back. From here, the paper should roll over, not under. Continue rolling it until you reached the reverse tip.
This one is quite difficult, but worth trying. Get the material, take the tip, and fold it. Start rolling the paper slightly around on any side of the folded tip to mold the heart’s top part. Once done, fold the tips down and form a heart. Finish it by rolling the rest of the material all over the heart.
Get a pair of scissors. Make an accordion just like what you do in the normal tip technique. Then, fold the accordion tip underneath so that it forms a star. If necessary, flip it back to the accordion form to make the shape tighter once you pleat it back.
Going back to an accordion, leave a part unpleated and cut it with the scissors. Pleat it back to form a star. This time, the star looks better. Get another sheet of the material and roll it around the created star.
It’s the most challenging of all these rolling techniques. You need a filter that measures ca. 3cm x ca. 10 cm. Make an accordion with a 1/3 of the paper and flip over the middle several times. This will form the top part of a marijuana leaf once you unroll the material.
After that, get the scissors and cut off a small part of the tip of the 1st fold to make it narrow than the others. Take the reverse tip and roll it under to leave a gap between the accordion tip and it. Slightly unroll the material and begin rolling it more tightly.
The upper of the leaf must be facing the reverse direction while you roll the material. When there’s ample space between the leaf and the roll, start rolling it all over to finish the design.
Take note that the joint filter will occupy a small part of your rolling paper. Thus, when loading the rolled paper with weed, be sure to save at least a ½ inch space for your joint filter. It will lessen the amount of space for the weed, but doing this will be worth it because you’ll be able to consume the entire plant matter. Nothing will be wasted.
Learning how to make joint filters can be fun and tricky at the same time. It’s okay if you got it wrong since it will be your first time. With patience and continuous practice, you’re sure to master the art of making your favorite design.
Important Links
Subscribe and Get 10% Off
Connect With Us