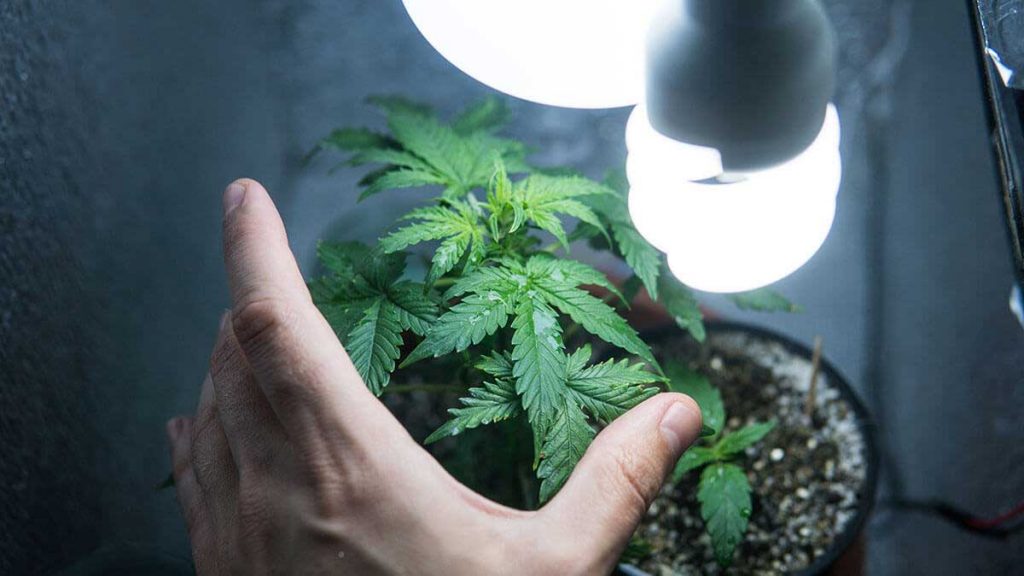

Stealth growth is the best way to secretly cultivate your supply. You can grow weed stealthily in a spare room or outdoors as long as you can screen your plants to hide them. And aside from these, stealth growers use an ingenious solution and this is to grow wed inside a growing closet.
Aside from the legality of weed in their area, many growers prefer to cultivate weed stealthily because of the convenience. If you only need a few plants or you’re growing weed for your supply, it would be practical just to use a growing closet.
In some cases, growers use growing closets or cabinets to cultivate sensitive plants. Strains like ACDC, Trainwreck, and Headband are just three of the most finicky strains that need extra-special care when cultivated. Growing these inside a closet lets you monitor your plants’ growth, check for any growing problems, pests, molds, and so on. A growing cabinet protects difficult plants from pests, molds, and diseases. Also, a growing cabinet can provide the best growing environment such as the right lighting, humidity, and air circulation which your plants specifically need.
In some cases, growing weed inside a cabinet is the best way to cultivate different strains. Since different strains have different growing needs and characteristics, placing your plants in separate growing closets helps them grow better rather than together in an indoor or outdoor setting.
As much as closet growing has tremendous benefits to growers, not all cannabis strains will survive this growing condition. Some strains grow very tall and very wide and thus, placing these strains inside a cabinet may affect the way these plants produce yields.
Sativa plants, in particular, are known to grow very tall and produce high yields. Also, sativa-dominant strains may grow taller as well but not as all as pure sativa.
You need the right materials to grow inside a growing closet:
These are steps to grow weed in a ready-made growing closet.
Take note that it must be a strain that will survive the closet growing. Select the type of seeds you wish to grow. We recommend an autoflowering cannabis strain.
Why an automatic strain? Because this type of strain can grow easily in almost all environments (indoors, outdoors, or inside a greenhouse) you won’t find it hard to cultivate this strain at all. Also, an automatic strain will be easier to bloom with no need to use a special growing light schedule. Finally, automatic strains stay small and this is a wonderful characteristic that you will love to have in a closet-grown plant.
As you finally select the strain you wish to grow, study well its growing needs and characteristics.
There are many types of growing cabinet. Some may have a simple design with just merely a tent or cabinet and some supports or shelves for the plants. However, some growing cabinets come with complete equipment like lighting, fans, pots, shelves, reflective materials, and measuring devices (thermometers and hygrometers). These types of cabinets are efficient and practical rather than making your growing cabinet but may be expensive.
Set up your growing cabinet according to the manufacturer’s instructions.
Follow the seed bank’s germination steps to get the most out of the company’s germination guarantee. The most common germination method preferred by seed banks is the damp paper towel technique. To go about this, place your seeds in between two damp paper towels and place them on a plate. Cover these with another plate and place them in a dark and quiet environment.
Check on your seeds every day and spray the paper towel with water to keep it damp. Once the taproot breaks from the seed, and a small part of the plant sprouts from the opposite part of the seed, it’s time to plant this to your growing medium.
Time to prepare the growing medium (soil) to make way for the newly sprouted plants. Use healthy, organic soil that is available in local garden shops. Place soil in large pots, a 5-gallon pot with adequate drainage holes at the bottom would do. Put enough soil in the pot and allow at least an inch or two from the edge of the pot space.
Place water in the soil and let the water drain from the holes of the pot. Wait until the soil is damp before digging a hole in the middle and placing one seed in. Cover with more soil and water once more.
Once you’re done. Place the pot inside the growing closet and allow light to shine on the pot or pots if you prepared more newly-sprouted seedlings. The light must be at least two or three inches from the surface of the soil for maximum penetration once the seedlings have reached the surface of the soil.
It won’t take too long for your seedlings to break from the soil. And when these do, adjust the lighting constantly. Most ready to use growing closets come with adjustable lighting either by a pulley system or a moving bracket system; adjust these accordingly.
Your plants will undergo rapid growth in just a few days and soon, you’ll find yourself adjusting the lamps time and again. It’s also time to gradually adjust the lighting schedule from a steady 24-hour light to 20-hour light – 4-hour dark and slowly until you are at an 18-hour light and 6-hour dark.
Humidity should be kept high during the early weeks of your plant’s life. Humidity is high as 75% is best for seedlings but you must reduce these to increments of 5 degrees per week until you are at 45 to 50% during the weeks when your plants are growing fast.
It’s easy to adjust lighting inside a growing cabinet but what about the humidity? As long as you have an efficient digital hygrometer, you can adjust the humidity inside the cabinet accurately. Watering your plants or adding a small bowl of water at the lower part of the cabinet are ways to
increase humidity while opening a window or the door and using a small fan inside the cabinet are simple ways to decrease humidity.
Another important part of caring for your plants is providing the correct nutrients according to the growing phase of your plants. During the growing or vegetative phase, use fertilizers that come with higher nitrogen levels as this nutrient is needed in growing new leaves stems and plant parts.
And during the flowering phase, your plants will need a new set of nutrients, one with less nitrogen and more phosphorus and potassium. This is because your plants will cease to grow during this phase. Your plants will now need nutrients that will help improve bud growth and promote good yields.
Nutrients are usually dissolved in water and applied to plants. Always monitor your plants’ post-application of nutrients and stop the application if you find anything wrong with your plants. Take note of leaf color changes, wilting, and changes in the texture of leaves.
Closet-grown cannabis does not require daily watering unless you have a very strong lighting system. If you must water your plants, apply water only when the soil is dry, not when it’s wet or damp. If you find that your soil takes longer to dry up, use a small fan to dry it quickly. Apply clean, pH-neutral water to your plants.
Even indoor or stealthily-grown plants are not immune to the onslaught of pests, mildew or molds. And the best way to deal with these problems is to stay ahead and prevent them.
When it comes to molds and mildew, keep the growing closet dry and the humidity low especially during the flowering stage. At the first sign of mold or mildew, treat these right away using natural techniques.
To prevent pests, never take a rouge plant inside the closet. Also, wash your hands before you handle your plants. And just like molds, get rid of pests at the first sign. Don’t overlook one bug because there’s likely more nearby.
Your closet-grown plants will eventually come to a stage when these are ready to bloom. Remember, we are using automatic plants here, and thus, these will bloom without any need for a special lighting schedule. The blooming phase starts differently for each plant while some plants that are sick and may be suffering from nutrient deficiencies or stress may flower later. Therefore, whatever you do, avoid stressing your plants.
Your plants are in the blooming phase when you spot soft, white, and wispy flowers; these means that you have female plants. Meanwhile, male plants will grow green balls or sacs which contain pollen needed by female plants to grow seeds. Usually, growers remove male plants from the garden to prevent accidental pollination.
Since we are using autoflowering plants, it’s a guarantee that your plants are females and thus, there’s no need to worry about accidental pollination.
Taking care of blooming plants is very similar to the vegetative stage except, your plants will require more help preventing molds and pests. As your plants bloom, the buds attract pests and may retain moisture as well. You need to double down with improving moisture in your growing closet and keeping the area clean to prevent pests.
And just like the growing phase, you must be keen on monitoring your plants from pests and molds. Keep the humidity levels low to prevent mold development. Always measure the humidity levels in your growing cabinet and do all you can to keep moisture out.
Indeed, this is the much-awaited part of growing weed inside a closet! But before harvest time, you must consider the following.
Cease watering and applying nutrients. Your plants will no longer need them. Also, watering until your plants are due for harvest can make drying times longer. Understand the signs of harvest time: darkening trichomes and pistils changing colors. When you notice that most of the trichomes or the small glass-like structures are starting to become darker or cloudier then it’s time to harvest. When the pistils or the long hair sticking out of the buds are turning darker, it’s time to harvest as well.
Consider the right harvest time. Also, take note that when you harvest early, you’ll get a stimulating high while harvesting later can make weed more relaxing. Don’t wait very long since you’ll only harvest weed that will instantly knock you out!
Harvest by cutting the buds or removing the entire plant. Separate the buds from the plant and keep these in a dry and dark environment. Don’t forget to keep the area in low humidity to prevent mold from settling on the drying weed. You’ll know that your buds are ready when these are dry to touch.
Now that you know how to grow weed in a closet, we are confident that you’ll be able to grow healthy and highly-productive plants even inside a growing closet. We wish you success in your discreet growing activity at home.
Important Links
Subscribe and Get 10% Off
Connect With Us